French manicure nail guide strips offer a simple solution for achieving a professional-looking French manicure at home, eliminating the need for a steady hand and artistic skill.
What are French Manicure Nail Guide Strips?
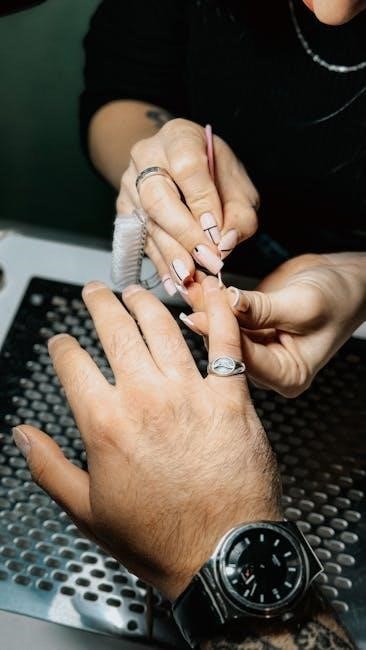
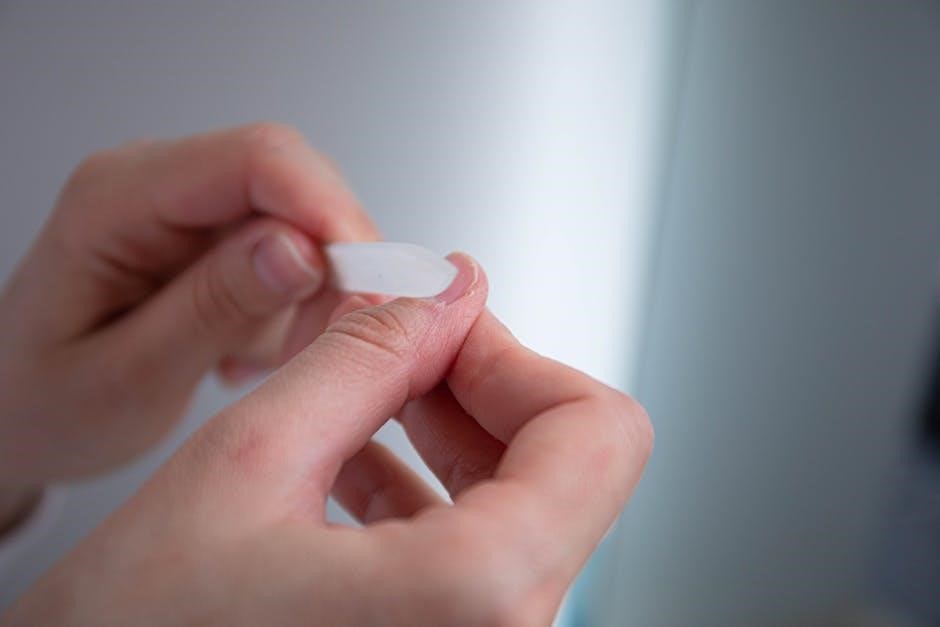
French manicure guide strips are tools designed to assist in creating the classic French manicure look – a pale pink or nude base with a crisp, white tip. These strips, typically made of vinyl or adhesive material, are applied to the nail before polishing, acting as a barrier to define the white tip area. They come in various shapes and sizes, catering to different nail beds and desired tip styles. They simplify the process, especially for those lacking artistic confidence, ensuring clean, symmetrical lines and a salon-quality finish.
Benefits of Using Guide Strips
Utilizing French manicure guide strips provides numerous advantages for both beginners and experienced nail enthusiasts. They guarantee consistently straight and even white tips, eliminating smudges and uneven lines. Guide strips save time and reduce polish waste, offering a cost-effective solution. They’re ideal for self-manicures, promoting a professional appearance without salon visits. Ultimately, these strips boost confidence and simplify achieving a flawless French manicure.
Types of French Manicure Guide Strips Available
Various guide strip types exist, including adhesive vinyl, peel-off liquid tape, and pre-designed sticker strips, each offering unique application methods and levels of precision.
Adhesive Vinyl Strips
Adhesive vinyl strips are a popular choice due to their reusability and precise line creation. These strips typically feature a sticky backing that adheres firmly to the nail, creating a crisp barrier for polish application. They are ideal for beginners seeking consistent results and can be repositioned carefully before the polish sets.
Proper application requires ensuring the strip is smooth and fully adhered to prevent bleeding.
Peel-Off Liquid Tape
Peel-off liquid tape presents a unique approach to French manicure assistance, forming a latex barrier around the nail. Applied like a liquid, it dries to create a defined edge for the white tip, then peels away cleanly after painting. This method offers flexibility, conforming to various nail shapes and sizes.
It’s known for its ease of use and minimal cleanup.
Pre-Designed Sticker Strips
Pre-designed sticker strips provide a convenient and often visually appealing option for French manicures. These strips come in various shapes and sizes, offering pre-cut guides for the classic French tip or more modern variations. They are incredibly user-friendly, simply applied to the nail before polishing and removed afterward.
They are great for beginners and quick touch-ups!
Preparing Your Nails for Application
Proper nail preparation is crucial for a flawless French manicure with guide strips; ensure nails are clean, filed, and shaped before applying any products.
Cleaning and Filing
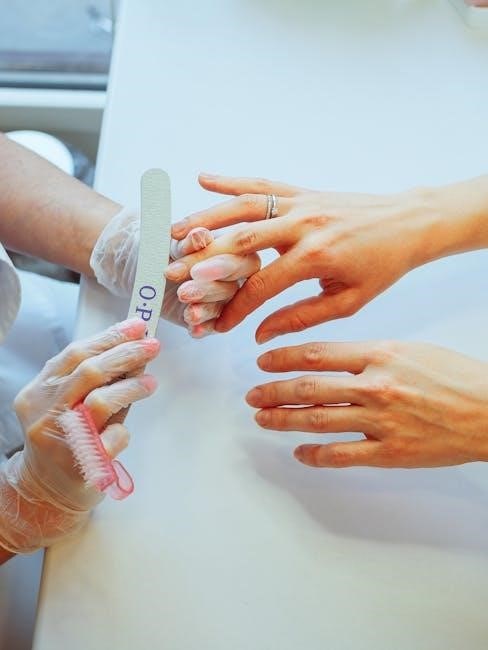
Begin by removing any existing polish completely with a non-acetone remover, protecting your nails from unnecessary dryness. Gently push back cuticles to create a clean canvas. Filing nails into the desired shape – square, oval, or almond – provides a smooth base for application.
Buffing the nail surface lightly enhances polish adhesion, ensuring a longer-lasting manicure. Thoroughly wash and dry hands to eliminate oils and residue, preventing lifting and ensuring the guide strips adhere properly.
Base Coat Application
Applying a base coat is crucial for protecting your natural nails from staining caused by colored polish, particularly the white tip. Choose a quality base coat that promotes adhesion, extending the wear of your French manicure.
Ensure an even, thin layer covers the entire nail surface, avoiding the cuticle area. Allow the base coat to dry completely before proceeding to the next step – applying the guide strips – for optimal results and a flawless finish.
Applying the Guide Strips: A Step-by-Step Guide
Carefully apply the guide strips to your nails, ensuring they are straight and aligned with the natural curve for a crisp, clean French tip.
Positioning the Strips Correctly
Achieving a flawless French manicure hinges on precise strip placement. Begin by ensuring your nails are thoroughly prepped with a base coat. Gently adhere the strip, angling it slightly downwards towards the nail tip. This creates the classic French line.
Pay close attention to symmetry; consistent angles across all nails are crucial. Press firmly to eliminate air bubbles and guarantee a secure bond, preventing polish from bleeding underneath during application.
Ensuring a Secure Fit
A secure fit is paramount to prevent polish seepage and achieve crisp lines. After positioning, firmly press the guide strip along its entire length, paying special attention to the edges and curves of your nail.
Use an orange wood stick or cuticle pusher to smooth any bubbles or wrinkles. A well-adhered strip acts as a barrier, guaranteeing a clean, professional French manicure result without frustrating smudges.
Painting the French Manicure
Painting the French manicure involves carefully applying polish to the exposed nail tip, creating the classic contrasting look with guide strips in place.
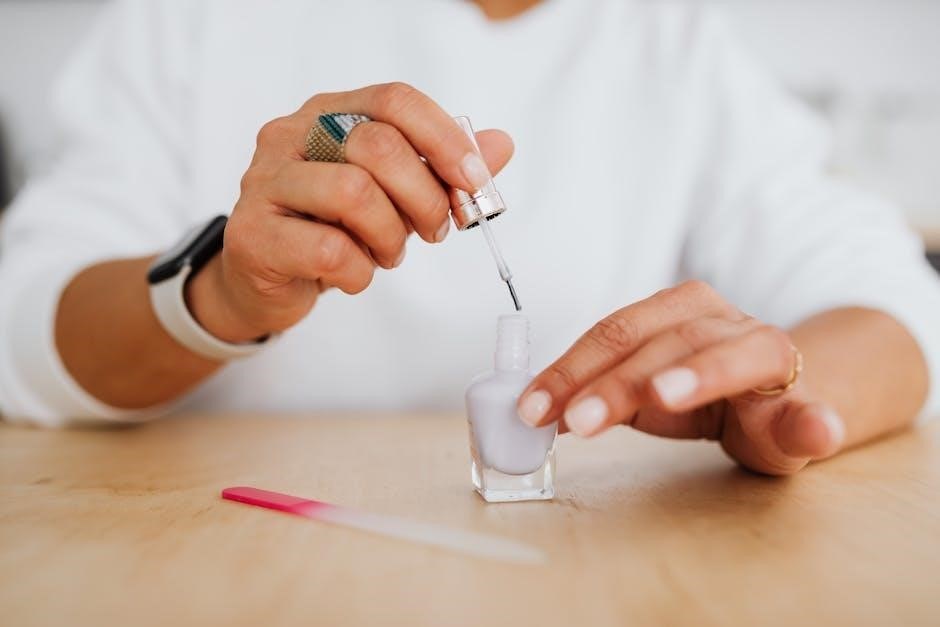
Choosing the Right Polish Color
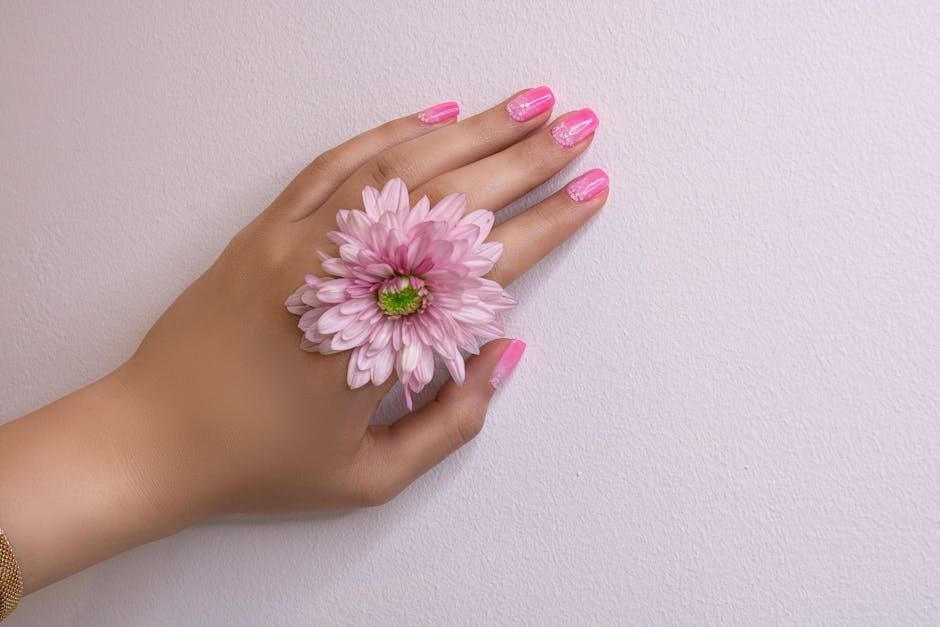
Selecting polish colors is crucial for a beautiful French manicure. Traditionally, a bright white is used for the tips, offering a clean, classic contrast against the natural or nude base. However, modern variations explore pastel shades, vibrant colors, or even glitter tips for a unique twist.
Consider your skin tone when choosing; warmer tones pair well with creamy whites, while cooler tones benefit from brighter, crisper whites. The base coat color should complement the tip color, enhancing the overall aesthetic.
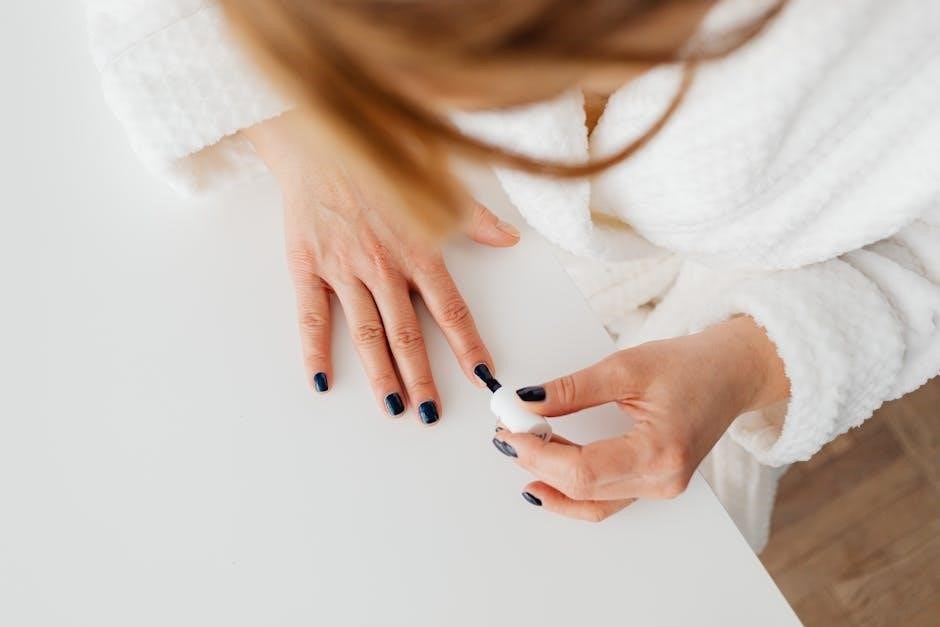
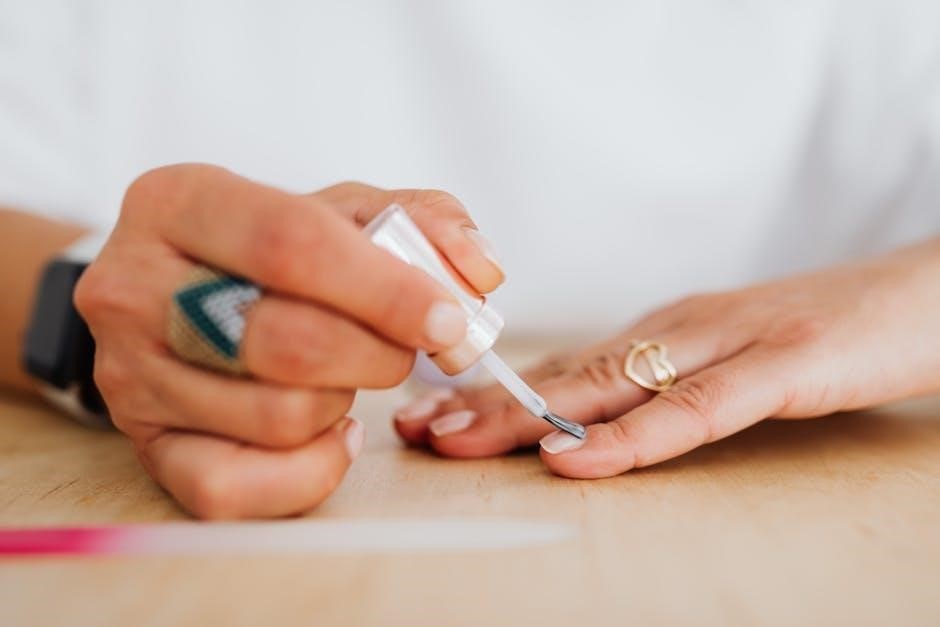
Applying the White Tip Polish
Carefully apply the white polish to the exposed tip of the nail, using thin, even coats. Avoid flooding the cuticle or sides, as this can create a messy look. Building the color gradually with two or three coats ensures opacity and a smooth finish.
A fine brush can help achieve precise lines, especially for curved or unique tip shapes. Allow each coat to dry slightly before applying the next, preventing smudging and ensuring a professional result.
Removing the Guide Strips
Removing guide strips requires careful timing, ideally while the white polish is still slightly tacky but not completely dry, to prevent smudging or lifting.
Timing is Key
Optimal removal timing is crucial for a flawless French manicure. Waiting too long allows the polish to harden, potentially peeling off with the strip and ruining the clean line. Removing them prematurely risks smudging the wet polish, creating an uneven and messy appearance.
Generally, aim to peel the strips off within 30-60 seconds of applying the white polish, when it’s tacky but hasn’t fully set. This sweet spot ensures a crisp, professional finish.
Gentle Removal Techniques
Careful strip removal prevents smudging and ensures a pristine French manicure. Avoid yanking or pulling abruptly, as this can disrupt the wet polish. Instead, slowly and gently peel the strip back on itself, at a low angle, moving away from the painted tip.
If resistance is met, pause and try a different angle; patience is key! A wooden cuticle pusher can assist with stubborn areas.
Finishing Touches
Final steps involve a glossy top coat for durability and shine, followed by careful cleanup around the cuticles to refine the perfect French manicure.
Top Coat Application
Applying a top coat is crucial for sealing your French manicure, preventing chipping, and adding a beautiful, lasting shine. Choose a quick-drying formula to minimize wait time and avoid smudging the delicate design. Ensure even coverage across all nails, including the white tips, for a professional finish.
Consider a top coat with UV protection to further enhance longevity and maintain the vibrancy of your polish. Two thin coats are generally better than one thick coat.
Clean Up and Refinement
After the top coat dries, use a small, angled brush dipped in acetone-based nail polish remover to meticulously clean up any polish that may have strayed outside the intended lines. This step refines the manicure, creating crisp, defined edges. Pay close attention to the cuticle area and sidewalls.
Moisturize your cuticles with oil to restore hydration after exposure to remover.
Troubleshooting Common Issues
Common problems like uneven lines or polish bleeding can occur; however, careful strip application, quality polish, and swift removal usually resolve these issues effectively.
Uneven Lines
Achieving perfectly straight lines can be tricky, but several factors contribute to this issue. Ensure the guide strips are firmly pressed onto the nail surface, eliminating any gaps where polish might seep under.
Also, verify the strips are applied consistently across all nails, maintaining the same angle and position. If lines still appear uneven, a clean-up brush dipped in acetone can refine the edges post-polish application, creating a crisp, professional finish.
Polish Bleeding Under Strips
Polish bleeding beneath the guide strips is a common frustration, often stemming from insufficient base coat or improperly sealed nail edges. Apply a generous base coat and allow it to fully dry before applying the strips. Ensure the strips are firmly adhered, pressing down along the edges to create a tight seal. Thinner polish coats also minimize bleeding, preventing seepage under the strip’s boundary.
Advanced Techniques with Guide Strips
Beyond the classic look, guide strips facilitate creative French manicure variations like diverse tip shapes and stunning ombre effects, expanding your nail art possibilities.
Creating Different Tip Shapes
French manicure guide strips aren’t limited to the standard curved tip; they empower you to experiment with various shapes. Angled strips create a modern, edgy look, while V-shaped strips offer a sophisticated twist. Straight-edge strips deliver a bold, geometric style. Carefully positioning and securing the strips allows for precise shaping, transforming a classic manicure into a personalized statement. Mastering these techniques unlocks a world of design possibilities, moving beyond traditional aesthetics and showcasing individual creativity.
Ombre French Manicures
French manicure guide strips facilitate stunning ombre effects by creating a clean line for gradient blending. Apply the strip as usual, then sponge on a lighter shade of polish towards the tip, gradually fading into the base color. Multiple coats and careful blending create a seamless transition. Removing the strip reveals a beautifully diffused, modern French manicure, offering a softer, more contemporary alternative to the classic stark white tip.

Where to Buy French Manicure Guide Strips
French manicure guide strips are readily available at numerous online retailers, as well as in the nail care sections of most drugstores and beauty supply stores.
Online Retailers
Numerous online retailers offer a vast selection of French manicure guide strips, providing convenience and competitive pricing. Major e-commerce platforms like Amazon and eBay feature diverse options from various brands and sellers. Specialized beauty supply websites, such as Sally Beauty, also carry a wide range of guide strips, often with detailed product descriptions and customer reviews.
Drugstores and Beauty Supply Stores
Local drugstores and beauty supply stores represent readily accessible options for purchasing French manicure guide strips. Retail chains like Walgreens, CVS, and Rite Aid typically stock basic strip varieties. Dedicated beauty supply stores, such as Ulta Beauty and Sephora, often provide a broader selection, including professional-grade options and specialized designs.
Caring for Your French Manicure
To prolong your French manicure, apply a top coat regularly, hydrate cuticles, and avoid harsh chemicals to prevent chipping and maintain a lasting shine.
Preventing Chipping
Maintaining a flawless French manicure requires proactive measures against chipping. Always use a quality base and top coat, ensuring complete coverage of the nail edges. Avoid prolonged water exposure by wearing gloves during dishwashing or cleaning. Reapply top coat every other day to seal the polish and add resilience.
Furthermore, keep nails adequately moisturized to prevent brittleness, which contributes to chipping. Handle your nails with care, avoiding using them as tools, and be mindful of potential impacts.
Maintaining Shine
Preserving the glossy finish of your French manicure is easily achievable with a few simple steps. Regularly apply a top coat – every two to three days – to refresh the shine and protect the polish from dulling. Avoid harsh chemicals and abrasive cleaners that can diminish the luster.
Hydrate your cuticles with oil to enhance overall nail health and reflect light, boosting shine. Gentle buffing can also restore a faded gloss.
Alternatives to Guide Strips
For those preferring alternatives, freehand painting or utilizing French manicure stencils provide viable options to achieve the classic look without guide strips.
Freehand Painting
Mastering the French manicure without aids requires practice and a steady hand. Begin with a quality base coat, allowing it to fully dry before attempting the white tip. Utilize a thin brush, ideally angled, to carefully create the desired curve along the nail’s edge. Consistent pressure and slow, deliberate strokes are crucial for achieving clean lines. Don’t be discouraged by initial imperfections; practice builds precision and confidence over time, resulting in a beautifully customized manicure.
Using French Manicure Stencils
French manicure stencils present a reusable alternative to strips or tape. These typically adhere to the nail bed, leaving the tip exposed for polishing. Ensure the stencil is firmly pressed to prevent polish from bleeding underneath. Apply the white polish carefully, then remove the stencil immediately after application while the polish is still wet for a crisp, clean line.